Hardware Transcoding
This holiday season I had some down time. I was watching a home video on Plex when I noticed some artifacting on my Samsung TV. While this can be easily solved by transcoding all of my media to the lowest common denominator client device, it would require a lot of processing power and time to go through the entire content library. Additionally, without knowing which devices my family members all use, I would have no way of creating a reliable experience for them. For my own needs, changing to a client device that supports the media I was playing is the most straightforward solution. For those who are sharing their Plex with family and friends, you will want to look closer at your hardware.
Research#
I began researching why this was happening to my headless Ubuntu server. Starting with the hardware, I knew that out of the box, Plex will use your integrated graphics chip on the processor to handle any decoding or encoding, and will ultimately fallback to the CPU. The server in my basement today is currently running on fairly old hardware, the CPU is actually an i7-4790k. A quick search reveals an Intel specification here. This page explains that the CPU has the following Processor Graphics.
Processor Graphics ‡ Intel® HD Graphics 4600
Graphics Base Frequency 350 MHz
Graphics Max Dynamic Frequency 1.25 GHz
Graphics Video Max Memory 2 GB
Graphics Output eDP/DP/HDMI/DVI/VGA
Execution Units 20
Max Resolution (HDMI)‡ 3840x2160@24Hz
Max Resolution (DP)‡ 3840x2160@60Hz
Max Resolution (eDP - Integrated Flat Panel)‡ 3840x2160@60Hz
Max Resolution (VGA)‡ 1920x1200@60Hz
DirectX* Support 11.2/12
OpenGL* Support 4.3
Intel® Quick Sync Video Yes
Intel® InTru™ 3D Technology Yes
Intel® Flexible Display Interface (Intel® FDI) Yes
Intel® Clear Video HD Technology Yes
# of Displays Supported ‡ 3
Device ID 0x412
While the Intel® HD Graphics 4600 is very capable for it’s time, it isn’t as powerful as more modern integrated graphics. Using Intel’s integrated graphics worked well for years, and I highly recommend using it if your server has a newer chipset, such as a UHD 630. However, in my case, upgrading my entire 1150 LGA system was not within budget. So I looked at alternative solutions, such as a dedicated GPU.
Purchase#
Knowing that I wanted a dedicated GPU over an integrated one, I made a list of requirements comparing various GPUs on sale. Mainly something that was not too expensive (under $150), energy-efficient, and somewhat future-proof. Fortunately a Plex Hardware Transcoding chart was built that makes considering which GPU to get a breeze. I made note of the Quadro P3000 (6GB), GeForce GTX 1060 (6GB), Geforce GTX 1660 (6GB), and GeForce GTX 1660 Ti (6GB) options.
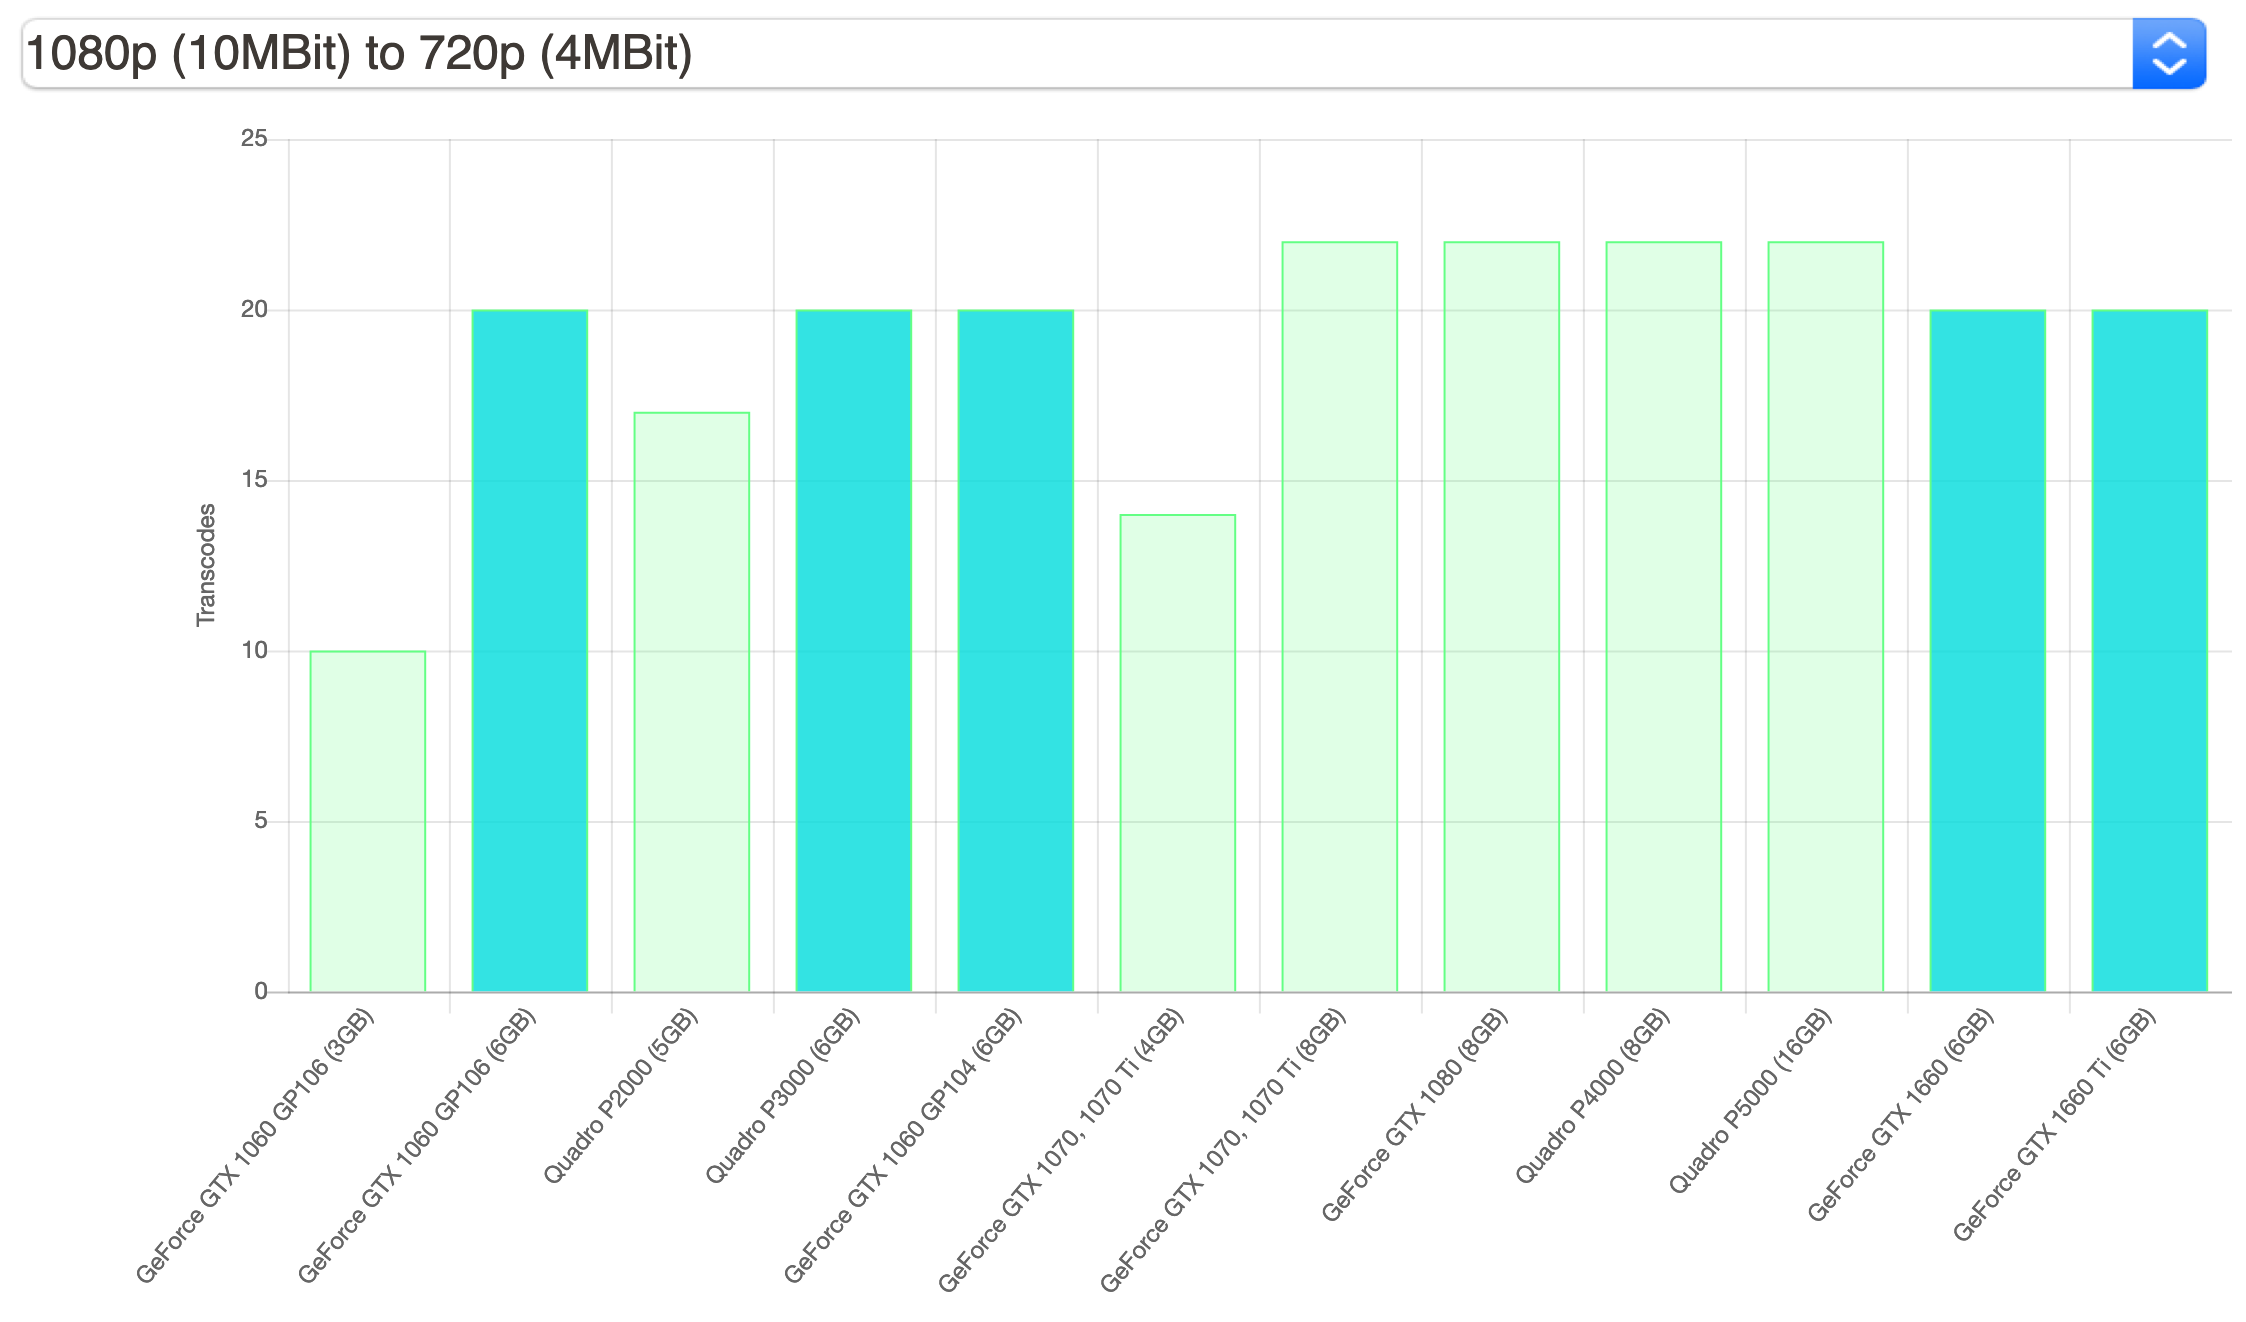
Looking at the chart above, these GPUs can support upto twenty simultaneous transcode streams. While all the GeForce GTX GPUs are limited to three simultaneous transcodes, a driver patch can be applied on Windows and Linux to remove this unnecessary limitation. Once the limitation is removed, the devices are capable of a theoretically unlimited number of transcode sessions. The next likely bottleneck for the GPU to run into is VRAM, and the options I chose above, all have 6GBs memory (while the Intel® HD Graphics 4600 had a measly 2GB). Of course, if you just go with a Quadro GPU instead, you don’t have to deal with this headache. However, Quadro GPUs tend to be more expensive, which makes them a less desirable option in this scenario, but they are certainly the easier choice.
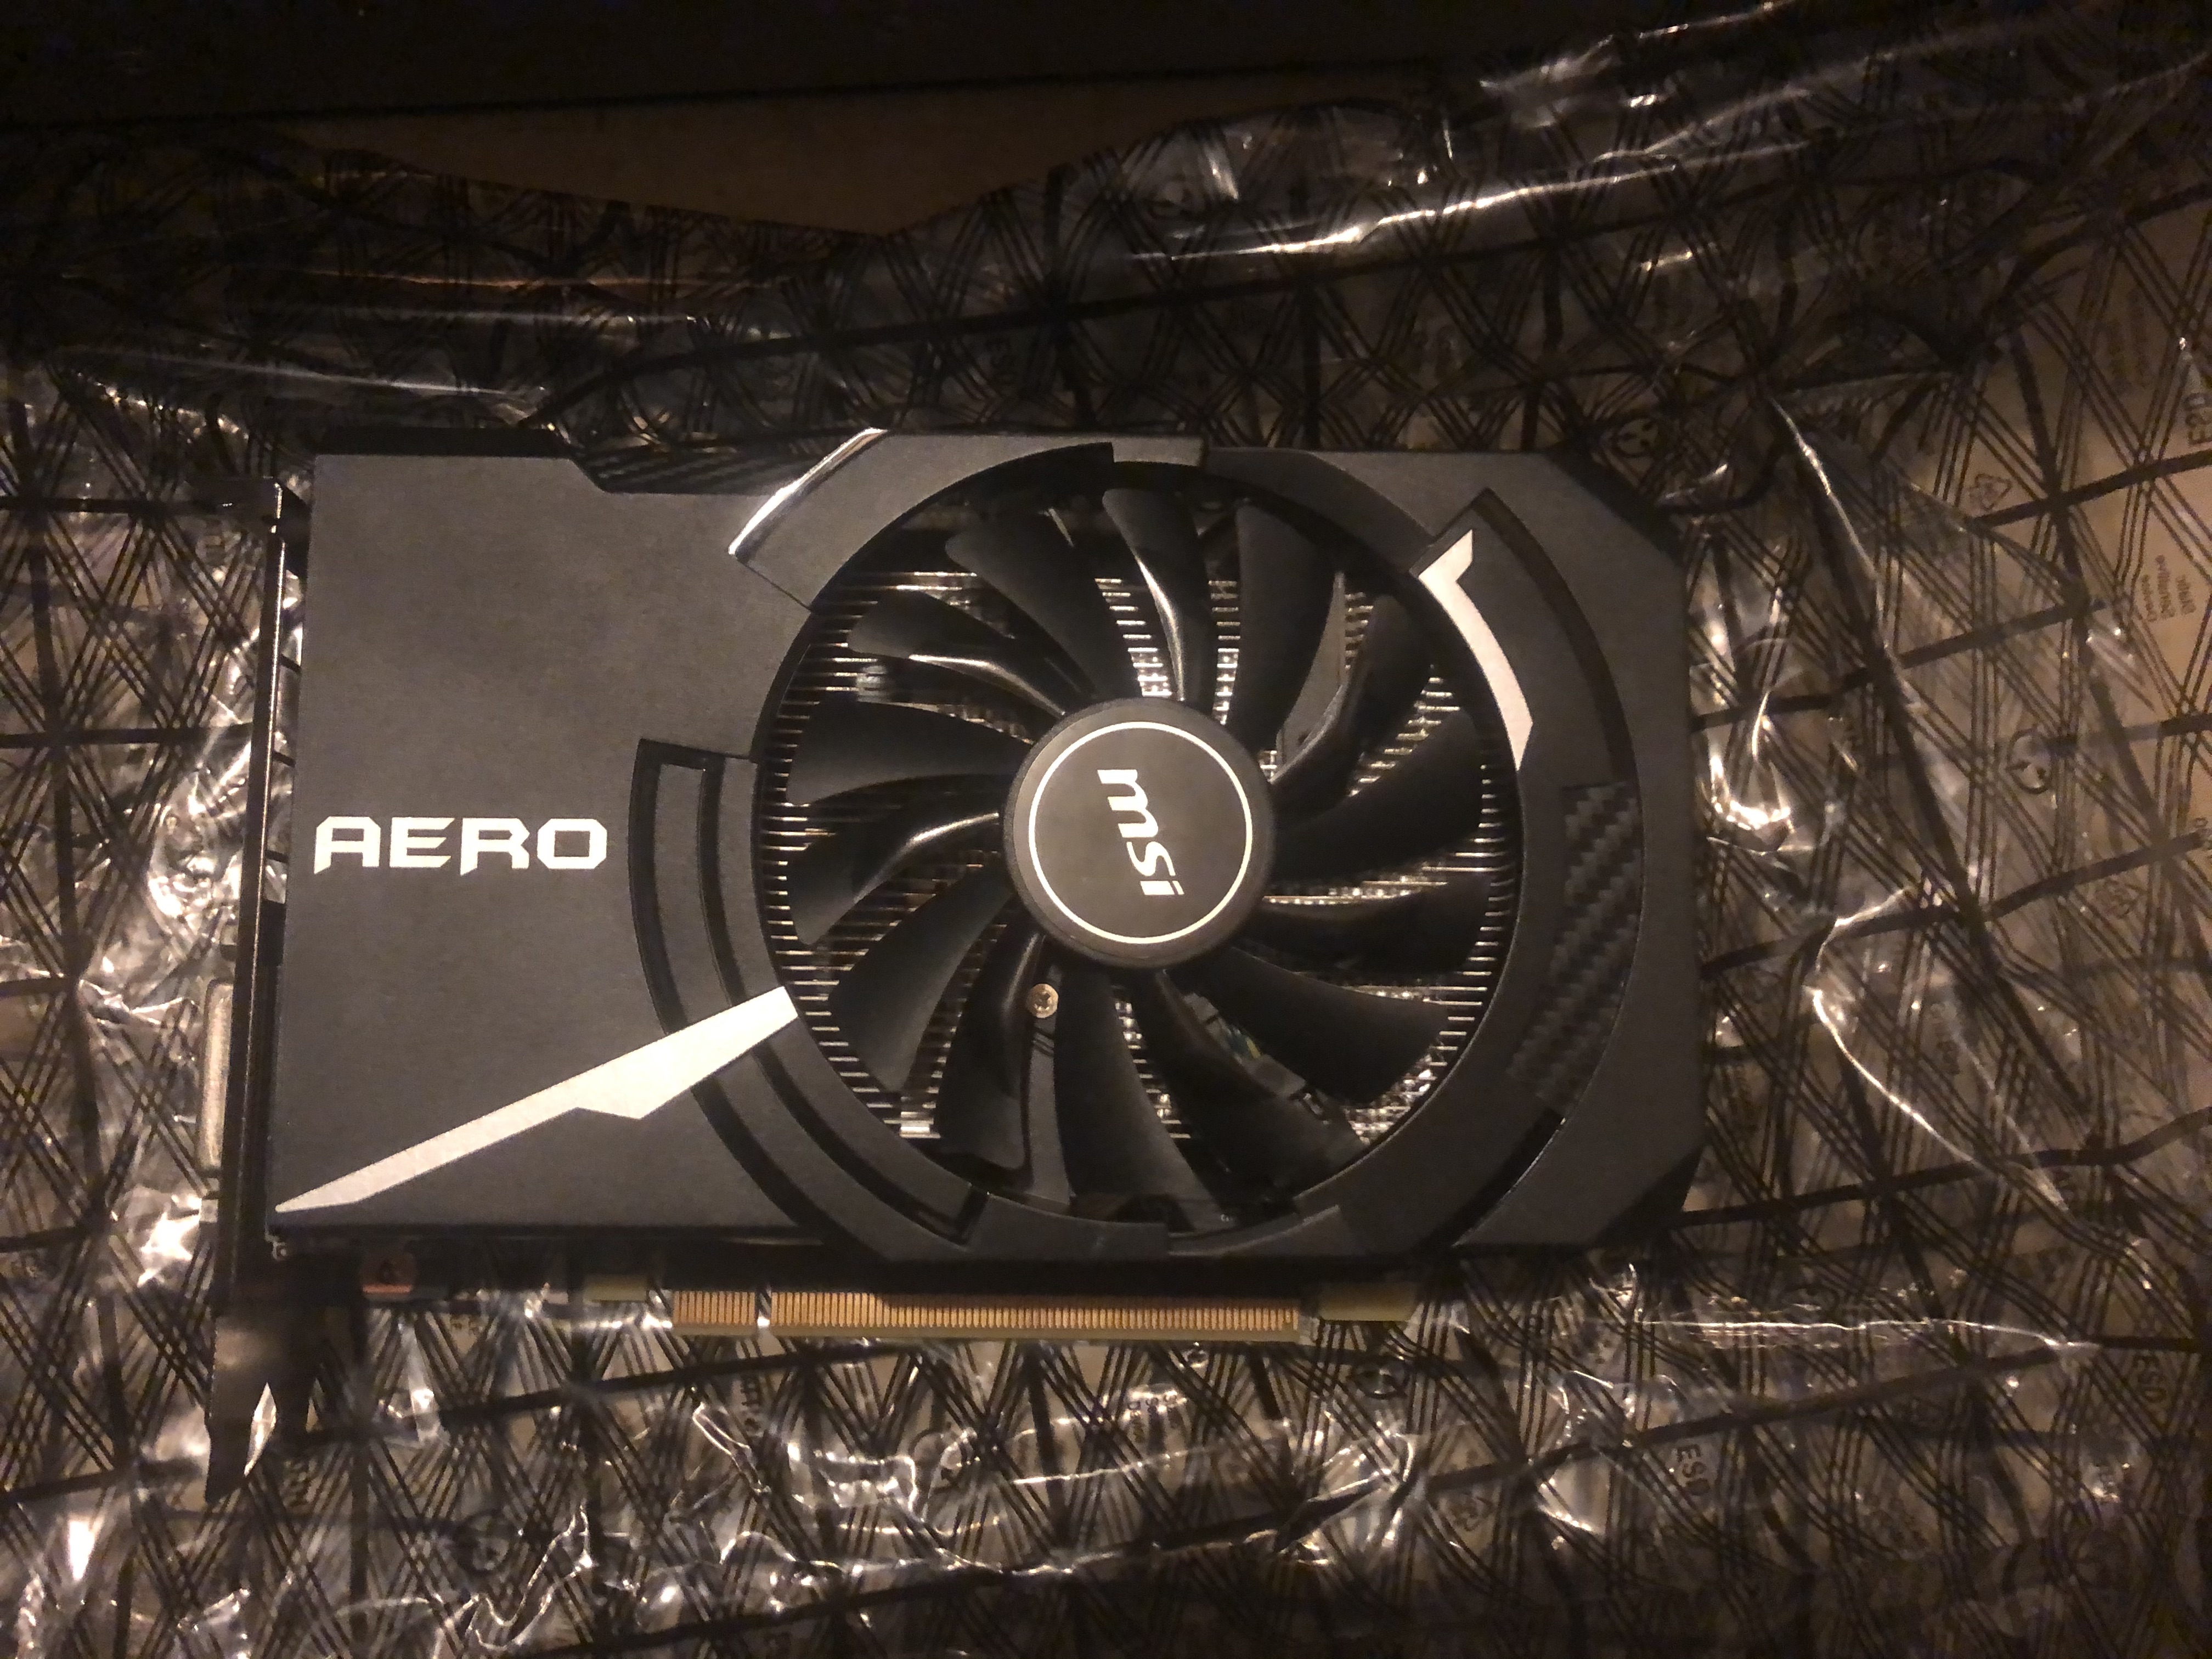
And so my hunt for a GPU began. I shopped around, and found some decent deals, but nothing was as good as what I saw on eBay, OfferUp, Mercari, and Craigslist. After being outbid on a couple GeForce GTX 1660 (6GB), I ended up snagging an MSI Aero GeForce GTX 1060 (6 GB) in an ITX Form Factor on Mercari for $100. The GPU arrived in the mail in 5 days, and was in really great condition.
Installation#
Installing the GeForce GTX 1660 inside of my server was easy. I shut down the computer safely, and unplugged all of my peripheral devices. Removed the metallic door on the server, and took a peek inside. Despite the machines age, it is in pretty good condition, at least when ignoring the hideous cable management.

After grabbing a 6-Pin PCI-E cable for the power supply and plugging in the graphics card, I was ready to turn the machine on. Expecting everything to go off without a hitch, I was sorely disappointed when video was no longer being displayed. Neither via the new GPU or the old. It seemed pretty clear to me that the computer was not POSTing. I knew that my 750 Watt PSU was capable of supplying enough power to support this 120 Watt (Max) Graphics Card, so I knew to look elsewhere.
Removing the Graphics Card alleviated the issue, but of course that is not the goal. I reexamined the setup and found the culprit to be the motherboards Voltage Protection. After changing the outlet that my server is plugged into in the APC Battery Backup, everything started working as expected. I suspected this was the issue, due to the fact that when plugged directly into a wall outlet, the computer booted. The Battery Backup only has around a 8% load, so it is certainly not drawing too much from it. If I had to guess, I’d say the older ASUS chipset on my motherboard likely has some protections in place that are misfiring. If anyone is more familiar with battery backups, I’d be interested to hear your thoughts on why this happens. I am just glad it was such an easy fix.
Nvidia Drivers#
Before running the nvidia-patch to remove the limitation on the GeForce GTX 1060 I needed to install the approriate nvidia drivers. While you can follow the instructions as described in the Github README of nvidia-patch, you can also do this using your OS’ package manager.
I started by running the following command, which recommended a driver for my graphics card. Below you can see the recommended driver is nvidia-driver-455. This happened to be the same one nvidia-patch recommended, so if you have a different list, keep an eye out that the driver is compatible with the patch you are applying.
$ sudo ubuntu-drivers devices
== /sys/devices/pci0000:00/0000:00:01.0/0000:01:00.0 ==
modalias : pci:v000010DEd00001C03sv00001462sd00003283bc03sc00i00
vendor   : NVIDIA Corporation
model    : GP106 [GeForce GTX 1060 6GB]
driver   : nvidia-driver-390 - distro non-free
driver   : nvidia-driver-450 - distro non-free
driver   : nvidia-driver-450-server - distro non-free
driver   : nvidia-driver-455 - distro non-free recommended
driver   : nvidia-driver-418-server - distro non-free
driver   : nvidia-driver-440-server - distro non-free
driver   : xserver-xorg-video-nouveau - distro free builtin
Next I installed the recommended driver for my graphics card and rebooted.
$ sudo apt install nvidia-driver-455
$ sudo reboot
I checked that the driver was installed successfully after rebooting by running nvidia-smi. Normally this would work as expected. Unfortunately my server BIOS had been configured to enable Secure Boot. On many modern motherboards you can just run the following command to import the secure key so that the OS will allow the driver to run.
$ sudo mokutil --import /var/lib/shim-signed/mok/MOK.derAfter rebooting, the driver was not available, and mokutil failed with every command, including when using the --import argument. After a bit of digging, I learned that on some motherboards, you can enroll keys in the BIOS SecureBoot setup. After installing the nvidia driver via apt, you’ll find the necessary key blob data in /var/lib/shim-signed/mok named MOK.der. This file is unique to my computer, and future driver installs will be signed with the same key.
I copied the MOK.der to a USB, and then rebooted into the BIOS. For my BIOS, I enabled Advanced Mode and then navigated to Boot/SecureBoot/KeyManagement. Here I found a lot of different options, but the one I needed was called Append to Default DB. A prompt appeared when selecting this option, choosing No allowed me to select a file from the USB. After selecting the MOK.der from the USB, a prompt popped up asking what type of data the file contains. I chose Blob Data and then saved (pressed F10) and rebooted.
Once the computer restarted, I ran nvidia-smi. Finally the driver was installed and running.
$ nvidia-smi
Sat Dec 19 17:38:11 2020
+-----------------------------------------------------------------------------+
| NVIDIA-SMI 455.38       Driver Version: 455.38       CUDA Version: 11.1     |
|-------------------------------+----------------------+----------------------+
| GPU  Name        Persistence-M| Bus-Id        Disp.A | Volatile Uncorr. ECC |
| Fan  Temp  Perf  Pwr:Usage/Cap|         Memory-Usage | GPU-Util  Compute M. |
|                               |                      |               MIG M. |
|===============================+======================+======================|
|   0  GeForce GTX 106...  Off  | 00000000:01:00.0  On |                  N/A |
|  0%   33C    P8     4W / 120W |      4MiB /  6075MiB |      0%      Default |
|                               |                      |                  N/A |
+-------------------------------+----------------------+----------------------+

+-----------------------------------------------------------------------------+
| Processes:                                                                  |
|  GPU   GI   CI        PID   Type   Process name                  GPU Memory |
|        ID   ID                                                   Usage      |
|=============================================================================|
|  No running processes found                                                 |
+-----------------------------------------------------------------------------+
Plex and Docker#
Now that the driver was functioning properly, and the graphics device appeared under /dev/dri I could configure Plex to use it. Currently, I run Plex within a container using Docker. To use a nvidia GPU with docker I had to follow the Nvidia docker documentation here. So I ran the following command, as described in the documentation.
$ sudo apt update && apt install -y nvidia-docker2Since I use docker-compose, I assumed I would need to update the docker-compose.yml file where the plex service is defined. Although the devices don’t need to change because I previously configured Intel Quick Sync transcoding, it is important that we set the appropriate environment variables. For us to get full hardware transcoding functioning correctly, we must set NVIDIA_VISIBLE_DEVICES=all and NVIDIA_DRIVER_CAPABILITIES=compute,video,utility. This will allow all of our Nvidia graphics devices and the associated libraries to be accessible from within the docker container. See my updated docker-compose.yml below which includes both environment variables.
version: '3.7'
services:
  plex:
    image: plexinc/pms-docker:latest
    restart: unless-stopped
    environment:
      - PLEX_UID=0
      - PLEX_GID=0
      - TZ=${TZ}
      - CHANGE_CONFIG_DIR_OWNERSHIP=true
      - NVIDIA_VISIBLE_DEVICES=all
      - NVIDIA_DRIVER_CAPABILITIES=compute,video,utility
    ports:
      - 32400:32400/tcp
      - 3005:3005/tcp
      - 8324:8324/tcp
      - 32469:32469/tcp
      - 1900:1900/udp
      - 32410:32410/udp
      - 32412:32412/udp
      - 32413:32413/udp
      - 32414:32414/udp
    devices:
      - /dev/dri:/dev/dri
    volumes:
      - ${CONFIG_ROOT}/config/plex/db:/config
      - ${CONFIG_ROOT}/config/plex/transcode:/transcode
I use version 3.7 of docker-compose, so unfortunately configuring the nvidia runtime is a bit more indirect. If you use the version 2 configuration of docker-compose you can just add runtime: nvidia to the docker-compose.yml instead. But for 3.7 I needed to update the /etc/docker/daemon.json with the following.
{
  "default-runtime": "nvidia",
  "runtimes": {
    "nvidia": {
      "path": "nvidia-container-runtime",
      "runtimeArgs": []
    }
  }
}
Now that I have docker configured to use the nvidia runtime, I need to restart the docker service. This can be easily done on Ubuntu server by executing the following command.
$ sudo service docker restartThen I restarted the services that manage my container orchestration.
$ sudo service theater restartI verified that the correct libraries were made available to the container using the following command.
$ docker exec -it plex ldconfig -p | grep -i nvidia
  libnvidia-ptxjitcompiler.so.1 (libc6,x86-64) => /usr/lib/x86_64-linux-gnu/libnvidia-ptxjitcompiler.so.1
  libnvidia-opticalflow.so.1 (libc6,x86-64) => /usr/lib/x86_64-linux-gnu/libnvidia-opticalflow.so.1
  libnvidia-opencl.so.1 (libc6,x86-64) => /usr/lib/x86_64-linux-gnu/libnvidia-opencl.so.1
  libnvidia-ml.so.1 (libc6,x86-64) => /usr/lib/x86_64-linux-gnu/libnvidia-ml.so.1
  libnvidia-encode.so.1 (libc6,x86-64) => /usr/lib/x86_64-linux-gnu/libnvidia-encode.so.1
  libnvidia-compiler.so.455.38 (libc6,x86-64) => /usr/lib/x86_64-linux-gnu/libnvidia-compiler.so.455.38
  libnvidia-cfg.so.1 (libc6,x86-64) => /usr/lib/x86_64-linux-gnu/libnvidia-cfg.so.1
  libnvidia-allocator.so.1 (libc6,x86-64) => /usr/lib/x86_64-linux-gnu/libnvidia-allocator.so.1
Then verified nvidia-smi functions as expected.
$ docker exec -it plex nvidia-smiI saw the same output as before when running nvidia-smi so I knew the container had access to the graphics device. Now we just need to make sure plex is able to transcode media. I played the video that was originally producing artifacts on my TV. On another device, I opened a browser, navigated to my plex server, and then went from Settings to Manage / Console. Here I could filter the Console logs however I wanted.
For those adverse to using the Plex dashboard, you can easily do this on the server like so.
$ tail -f plex/db/Library/Application\ Support/Plex\ Media\ Server/Logs/Plex\ Media\ Server.log | grep "TPU:"If I filter by TPU: or MDE: I can see what device is being used for transcoding and why transcoding is happening. Below is a helpful list of terms I found that can be used for debugging.
MDE:
TPU:
ffmpeg
codec
decoder
encoder
hardware
The output shows the following when filtered by TPU:.
Dec 19, 2020 13:36:34.912 [0x7fea797fa700] DEBUG - [Transcode] TPU: hardware transcoding: using hardware decode accelerator nvdec
Dec 19, 2020 13:36:34.912 [0x7fea797fa700] DEBUG - [Transcode] TPU: hardware transcoding: zero-copy support present
Dec 19, 2020 13:36:34.912 [0x7fea797fa700] DEBUG - [Transcode] TPU: hardware transcoding: using zero-copy transcoding
Dec 19, 2020 13:36:34.912 [0x7fea797fa700] DEBUG - [Transcode] TPU: hardware transcoding: final decoder: nvdec, final encoder: nvenc
Analyzing these logs, I saw that both nvdec (Nvidia Decoding) and nvenc (Nvidia Encoding) were being used when hardware transcoding. While Plex was busy, I also ran watch -n 0.5 nvidia-smi in a separate tmux session. This made it easy to monitor the GPU temperature, usage, and power draw. Fortunately, while idle the GPU stays around 35° Celsius and draws ~4 Watts. During load on two streams I saw the temperatures rise 13° to 48° Celsius and wattage increase to ~35 Watts. While the GPU has its own limitations, Plex will fallback to the CPU if it can’t use the GPU for some reason, such as an unsupported format or the GPU being too busy. However, it is not capable of load balancing between multiple GPUs such as multiple GeForce GTX 1060s or the Intel® HD Graphics 4600 coprocessor.
Was it all worth it?#
I can now watch videos without weird artifacts appearing on my TV, and my family and friends can do so without having to worry so much about which device they are using. If you are interested in reading more about hardware accelerated streaming with Plex, they have a great article on the subject here. While this was an afforable and fun upgrade for my server, your system will likely have different needs and requirements. If you are building from scratch, the easiest path will certainly be to get an Intel processor that has powerful integrated graphics. The newer (2021) Rocket Lake processors for example will support hardware decoding for HEVC 12-bit, 4:2:2/4:4:4; VP9 12-bit 4:4:4 and AV1 8K 10-bit 4:2:0. When considering building a Plex Server of your own, I recommend reusing what you can. Many users of Plex have it running on nothing but a Raspberry PI, but for those users, you can be sure they are mostly utilizing direct play over transcoding.
Comments
This post doesn't have a discussion thread yet. Find me at@vinnymac.dev on Bluesky to chat.